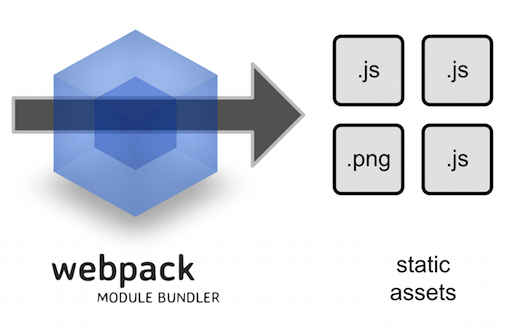
On a basic level, webpack is a build tool. A build can be described as converting source code files into standalone artifacts that can be run on a computer. What webpack does, is bundle modules used within a frontend application into a single file. So what does this have to do with javascript? When working with javascript, there are certain tasks that you do on a regular basis (especially if you are building a large scale application). Things like file concatenating and minification of javascript and CSS files, running tests, linting etc. The reasons why we do these is so our javascript applications are performant. By having a build step we can solve issues like multiple web requests, code file size, file order dependencies, code syntax checking(linting) and many more. Having a build step mitigates these problems related to development.
Webpack is just like any task runner(like gulp and grunt). Setting up a task runner in your project will enable you to do things like watching file changes, concatenating/minifying files, prefixing files for different browsers, linting Javascript, and module loader order. What makes webpack special from other task runners is that has something called loaders. Loaders can transform files from a different language like, CoffeeScript to JavaScript, or inline images as data URLs. Loaders even allow you to do things like require() css files right in your JavaScript( one less http request )!
Setting up Webpack
To start using Webpack, please make sure that you have Node installed. There are many resources on the web on how to do that so i will not be covering that here.
npm install webpack -gThis makes webpack available on a global level. Now lets use webpack to do something. Lets create a fictitious project called AwesomeApp. For now, it has an index.hml file and one javascript file. The contents are as follows
index.html
<html> <head></head><body><div id="myContent"></div><script src="app.js"></script></body></html>
Then the contents of app.js will look like this
app.js
var content = document.getElementById("myContent");
content.textContent = "This is my Food App. Lets EAT";
console.log("My App is loaded!");
This is a simple example however. In a real world project chances are you have a lot more code. But lets start small and expand from there. To use Webpack to build your app, change directory into the project folder (using the command line). The standard format for using webpack is as followers
webpack <js_location> <output_js>Here js_location is the location of your javascript file and output_js is the name of the final javascript file that will be outputted. To build our simple project, we will run
webpack ./app.js bundle.jsThe common naming convention here is to use bundle.js as your final javascript file. Taking a look at your project directory you should see bundle.js. Edit your HTML as follows
<html> <head></head><body><div id="myContent"></div><script src="bundle.js></script></body></html>
Go ahead a look at the contents of bundle.js if you dare! Scroll to the bottom of the file, you will find your original code in there along with generated code from the Webpack tool.
You can clone the project on git
git clone https://github.com/scriptonian/webpack-fundamentals.gitUsing Configuration files with webpack
Setting up a configuration file with Webpack will make life easy for us. We dont need to type in any complicated commands to build our project. Create a config file by creating a simple text file in your project. Name the file webpack.config.js . This configuration file in webpack is a commonJS module. Find find more information here
So in our config file we implement our module like this
module.exports = {entry: "./app.js",output: {filename: "bundle.js"}}
I think this is pretty self explanitory. In our exports module we define two keys: entry ( the js file location ), and output ( the name of the final build file ) just like we did earlier with the first command, only this time they are defined in the config file. You can go ahead and delete the bundle.js file in your folder, just to see it generated again(you don’t have to do this, it get overwritten every-time you build your project). With everything now in place, head back into your command line and type
webpackAnd voila! A new bundle.js file is generated with this one simple command. Can this get any easier? Well… yes:-) We can setup webpack to watch for file changes in our projects and build it automatically. This will prevent us from ever having to type the webpack command. There are a few ways to do this. The first is to run the following command in our project folder
webpack --watchRunning this command, webpack goes into its watch mode, and constantly scans your project for changes. A build is done everything you hit save. Another way to watch your project files for changes is to set another property in your config file (prevents you from always typing the command)
module.exports = {entry: "./app.js",output: {filename: "bundle.js"}, watch: true}
With this in place, we can run our basic webpack command
webpackThis automatically puts webpack into watch mode without having to append the – -watch to the command. Sweet!
Webpack Dev Server
Now lets get even lazier. Webpack comes with a local webserver called dev server. It may be more useful to run your apps using this webserver because it automatically refreshes your browser as well. This way we get both automatic builds and refreshes as we work. To use this however you have to install the server using NPM
npm install webpack-dev-server -gAfter it is installed, run devserver by typing the following command
webpack-dev-serverIf success you should see a command line message saying webpack: bundle is now VALID
Head over to this url in your browser
http://localhost:8080/webpack-dev-server/And there you have your application running. Now trying make a change in your HTML or Javascript and Save… Webpack does all the magic for you. There is however an issue here depending on your application needs. When point at the “webpack-dev-server” url, webpack is actually running your app in an iframe (notice the APP READY title bar at the top or inspect element). You may or may not want this. You can run your application using http://localhost:8080/ but you will loose the automatic browser refreshes. To get automatic refreshes using the http://localhost:8080/ you have to first terminate the server and run the following command
webpack-dev-server --inline
With this in place we have the best of both worlds. Go to http://localhost:8080/ (you may have to specify the name of your HTML file or webpack will default to index.html page). But here you find your application working as it should with automatic refresh.
How to build multiple files
With this setup in place, we are ready to handle slightly more complex builds. Lets add a few more javascript files to our project. We will add 2
food.js
recipes.js

In our app.js, let use require food.js
app.js
require('./food')
var content = document.getElementById("myContent");
content.textContent = "This is my Food App. Lets EAT!";
console.log("My App is loaded!");
The contents of food and recipes are as follows
food.js
console.log("This is the food container module");recipes.js
var sample = "Rice and beans";
console.log("Initializing recipe data");
When we run our app, there are a few things we see. We see the console.log statements from our food.js and our app.js. However we dont see logs coming from our recipes.js file. What if we dont necessarily want to require it in our app.js, however we still want it to get loaded in the final build? We can do this in our config file. We can specify an array of modules or javascript files that need to load. We do this in the entry point. Lets modify that
webpack.config.js
module.exports = {entry: ["./recipes", "./app.js"],output: {filename: "bundle.js"}, watch: true}
With every change in our config file, we have to restart the server. So restart the server (Ctrl+C) and start it again
webpack-dev-server --inline
or
webpack-dev-server
Either one is fine, depending on your project needs. With this in place, you should be getting all console.log messages from all your modules via bundle.js.
Webpack Loaders
According to the webpack documentation, Loaders allow you to preprocess files as you require() or “load” them. Loaders are kind of like “tasks” (in other build tools), and provide a powerful way to handle frontend build steps.
So lets add some loaders into our application. Lets add the ability to do Linting and support ES6. The loaders here will be Babel and the other will be JSHint. To summarize what we are doing here, we want to add these loaders so they perform the task of converting our ES6 code to ES5 as well as do code Linting. Let us create a package.json file in our project. To do this we use npm
npm initThis will create a package.json file in your project. Open this file and modify it to add some devDependencies.
package.json
{"name": "webpack-fundamentals","version": "1.0.0","description": "my most awesome food app","main": "app.js","scripts": {"test": "echo \"Error: no test specified\" && exit 1"},"author": "I-am Konstantin","license": "ISC","devDependencies" : {"babel-core": "^5.4.7","babel-loader": "^5.1.3","jshint": "^2.7.0","jshint-loader": "^0.8.3","node-libs-browser": "^0.5.2","webpack": "^1.9.10"}}
What we are doing here is adding all these modules into our project so we can use them. Install them by running
npm installWith the libraries installed we can now use them. Let us change our food.js file to be ES6 instead of 5. We do this by renaming our food.js file to food.es6.
food.es6
let food = (foodname, type) => {if (foodname !== "burrito" || type !=="breakfast") {console.log("Sorry No Food for you");}}food("burito", "lunch");
SIDE NOTE: In this tutorial i used brackets as my text editor. I had to install a plugin that treats ES6 as javascript so i could retain my code coloring etc. You may have to do this.
Now that we have our ES6 file we have to go into our webpack config to setup Babel.
module.exports = {
 entry : ["./recipes", "./app.js"],
 output : {
   filename: "bundle.js"
 },
 watch : true,
 module: {
   loaders : [
     {
       test: /\.es6$/,
       exclude: /node_modules/,
       loader: "babel-loader"
     }
   ]
 },
 resolve : {
   extensions: ['', '.js', 'es6']
 }
};
Webpack provides a way to specify which loaders apply to different file types in your the configuration file. Specifying loaders in the configuration is the recommended approach in most cases as it doesn’t add any build specific syntax to the code, making it more reusable. Within loaders, test will test what kind of file to run through the loader; exclude tells which files to exclude when this loader is called; and loader is which module we are going to load(we want to load the babel-loader). Finally within resolve, we specify which extensions can be processed. What happens here is that when the build sees ES6 it knows its a file type it has to has to process and knows how to handle it appropriately. Please find out more on this page. Run your project and notice that it still works (event log statements from ES6).
Next we will add the JSHint loader. JSHint, a tool that helps to detect errors and potential problems in your JavaScript code. We will set this up as a preloader and NOT a loader, so it will run first (checking our code for synax errors etc).
module.exports = {
 entry : ["./recipes", "./app.js"],
 output : {
   filename: "bundle.js"
 },
 watch : true,
 module: {
   preLoaders:[
     {
       test: /\.js$/,
       exclude: 'node_modules',
       loader:"jshint-loader"
     }
   ],
   loaders : [
     {
       test: /\.es6$/,
       exclude: /node_modules/,
       loader: "babel-loader"
     }
   ]
 },
 resolve : {
   extensions: ['', '.js', 'es6']
 }
};
JSHint options are specified in a special file called “.jshintrc”. If you dont have one in your project create one.
.jshintrc
{}For now we will only have an empty object. For JSHint to work, let as add something to our code that will break the build. Let us add an eval function statement to our app.js
eval("This is very evil. Muhahaha");Now run your project! JSHint is now available in your build. This is a really nice feature because it warns you about possible bad practices you are using in your code and forces you to make those changes before pushing it out to production.
Adding a Startup Script
It would be nice to be able to run a simpler command that will build our project. Within our package.json file, there is a scripts sections. We can edit this and put any command name we want there to run our server instead of doing it via webpack-dev-server.
{"name": "webpack-fundamentals","version": "1.0.0","description": "my most awesome food app","main": "app.js","scripts": {"start": "webpack-dev-server"},"author": "I-am Konstantin","license": "ISC","devDependencies" : {"babel-core": "^5.4.7","babel-loader": "^5.1.3","jshint": "^2.7.0","jshint-loader": "^0.8.3","node-libs-browser": "^0.5.2","webpack": "^1.9.10"}}
Now all we have to do is run our project using the start command
npm startWorks like a charm.
Minifying bundle.js
If you want to minify bundle.js before pushing it out to production you can simply run this command
webpack -pAnd there you go. Minification done.
Using different configuration files
Sometimes you want to have different configuration files. Perhaps you want one for production and another for development. There are many reasons why you might want this. For us, lets just say we want remove all console.log() and eval() statements. To do this, we can add “strip loader” to our project using npm (as that is what its used for). Find more about strip-loader here
npm install strip-loader –save-dev
This will add strip-loader to your packag.json file. Now we will add a new config file. Call it webpack.production.config.js. We will make this an extension to our original config.js file
webpack.production.config.js
var WebpackStrip = require('strip-loader');var devConfig = require('./webpack.config.js');var stripLoader = {test: [],exclude: /node_modules/,loader: WebpackStrip.loader('console.log', 'eval')};devConfig.module.loaders.push(stripLoader);module.exports = devConfig;
What we are doing here is extend our webpack.config.js ! We create a stripLoader object and add it to its module loaders array in the config file. That way we add onto functionality specifically to production builds. So how do we specify which config file we want to use in our build?
webpack --config webpack.production.config.js -pCheck your project files. You can notice console.log statements being dropped(from the bundle.js)! They are not stripped out by the loader. The possibilities here are endless. I would like to hear you about some of the cool loaders you are using in your project.
Thats all folks! Whew… I dont know about you, but that was quite a lot to take in. I think this is decent for a fundamentals tutorial. I will be creating a more advance one in the future. Feel free to reach out on twitter as well ( @scriptonian ) if you have any questions.
Thank you for reading!